Skip to content

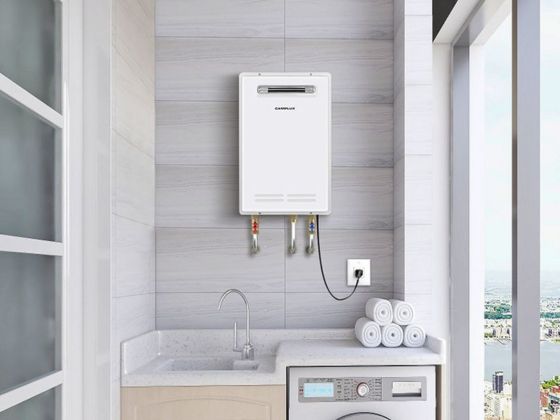


Resetting a tankless water heater by relighting the pilot light can seem daunting, but with the right guidance, homeowners can safely and efficiently restore their water heater's functionality. This step-by-step guide is designed to provide clear instructions for relighting the pilot light while emphasizing the importance of safety precautions. It's essential to follow the manufacturer's manual and understand the specificities of your tankless water heater model to ensure a successful reset.
Key Takeaways
- Safety is paramount when resetting a tankless water heater; ensure the area is clear and wait for any residual gas to dissipate before beginning.
- Understanding the function and type of your tankless water heater is crucial for proper maintenance and troubleshooting.
- Always turn off the gas supply and wait at least 10 minutes to allow gas to disperse before attempting to relight the pilot light.
- There are different methods for lighting the pilot light, including electronic lighting and manual ignition; consult your water heater's manual for the correct procedure.
- After relighting the pilot light, perform post-ignition checks to confirm successful ignition and monitor the water heater for proper function.
Before You Begin: Safety and Preparation
Understanding the Importance of Safety
When dealing with any gas appliance, safety must be your top priority. Always consult the printed owner's manual that accompanies your tankless water heater for specific safety instructions. These guidelines are designed to minimize the risk of property damage, injury, or worse.
Italics are used here to emphasize that while this guide is a helpful resource, it should never replace the manufacturer's instructions. Adhering to the safety labels on your water heater is crucial.
Remember, taking shortcuts can lead to dangerous situations. Always follow the proper safety protocols to ensure a safe and successful reset of your tankless water heater.
Before attempting any maintenance, familiarize yourself with the built-in safety systems of your water heater. For instance, modern heaters have fail-safes to prevent ignition in the presence of airflow issues. This is why experts recommend turning off the gas and waiting at least 10 minutes before relighting the pilot light, allowing any residual gas to disperse safely.
Clearing the Area and Ensuring Proper Ventilation
Before attempting to reset your tankless water heater, it's crucial to ensure that the area around the unit is free from any obstructions or debris. This not only facilitates easier access to the heater but also minimizes the risk of accidents. Clear a path to the water heater and remove any items that might hinder your movement or visibility during the process.
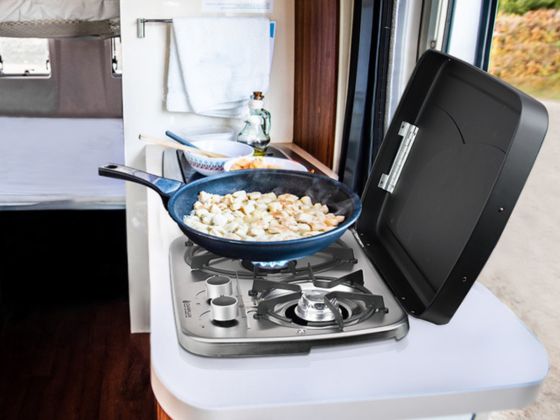
Proper ventilation is essential when working with gas-powered appliances. A sound ventilation system will incorporate a range hood with other techniques to give yourself the perfect cooking conditions. Your goal is to rid the space of any residual gas that may be present, as it could pose a significant hazard. Open windows or use fans to circulate fresh air into the area, ensuring that any gas build-up is effectively dispersed before you begin working on the heater.
Remember, adequate ventilation is not just about comfort; it's about safety. Without enough air, the water heater may not burn fuel properly, leading to dangerous situations.
Lastly, be aware of the signs of inadequate ventilation, such as a lingering gas smell or a pilot light that frequently goes out. If you encounter these issues, it may be necessary to consult a technician to address airflow problems before proceeding with the reset.
Identifying the Necessary Tools and Equipment
Before attempting to reset your tankless water heater, it's essential to gather all the necessary tools and equipment. Ensure the area is free from debris and obstructions to facilitate a smooth process. A clear workspace not only aids in efficiency but also contributes to safety.
Most tankless water heaters can be reset without specialized tools. However, certain tasks may require basic equipment:
- Flashlight: Useful in low-light conditions.
- Screwdriver: Needed for removing access panels.
- Owner's manual: Contains specific instructions for your model.
It's crucial to Press and Hold the Reset Button as instructed in your water heater's manual. This step is typically a part of the reset process and should be done with caution. Always refer to the manufacturer's guidelines for the precise duration and method.
Remember, your safety is paramount. If you smell gas or encounter any unusual signs, do not proceed with the reset and contact a professional immediately.
Understanding Your Tankless Water Heater
What is a Pilot Light?
A pilot light is a small, continuously burning flame in your tankless water heater that ignites the gas as it flows to the burner. This flame is crucial for the operation of your water heater, as it ensures that the main burner can be lit whenever hot water is needed.
The pilot light is a key component of a traditional water heater's functionality, remaining lit at all times to provide immediate ignition of the gas.
While electronic ignition systems have become more common, many water heaters still rely on a pilot light for operation. Understanding whether your unit has a pilot light or an electronic ignition system is essential for proper maintenance and troubleshooting.
The Role of the Pilot Light in Water Heating
The pilot light is a small, continuously burning flame that plays a crucial role in the operation of a tankless water heater. It serves as the ignition source for the gas burner that heats the water. When the water heater is activated, gas flows to the burner where it is ignited by the pilot light, providing the necessary heat.
In traditional tankless water heaters, the pilot light is always lit, ensuring that the heater can activate immediately when hot water is needed. This constant flame means that the pilot light must be reliable and maintained to prevent any disruptions in water heating. Maintenance is key to ensuring the pilot light functions correctly and efficiently.
- Locate the gas valve: Before attempting to relight your pilot light, turn off the gas to prevent any accidents.
- Wait: Allow time for any residual gas to dissipate to ensure safety.
- Relight: Follow the manufacturer's instructions to relight the pilot light.
It is essential to understand the pilot light's role to maintain your water heater's performance and safety. Regular checks and cleanings can help prevent issues and extend the life of your appliance.
Recognizing Different Types of Tankless Water Heaters
Tankless water heaters come in various types, each suited for different needs and preferences. Understanding the distinctions between them is crucial for making an informed purchase or maintenance decision.
The primary categories include:
- Gas Tankless
- Electric Tankless
- Hybrid Electric Heat Pump
- Combi Boiler
Each type operates differently and may require specific considerations for installation and use. For instance, gas tankless models heat water by burning gas and typically provide a higher flow rate, while electric tankless models use electrical elements to heat water and are often easier to install.
It's essential to choose a type that aligns with your home's infrastructure and your hot water requirements.
When selecting a tankless water heater, consider the brand as well. Some of the top tankless water heater brands include Rinnai, Rheem, Stiebel Eltron, EcoSmart, and Bosch. These brands are known for their reliability and performance in the long run.
The Initial Steps: Shutting Off Gas and Waiting
Locating the Gas Knob
Before attempting to reset your tankless water heater, it's crucial to locate the gas control knob. This knob is typically found at the bottom of the water heater, near the gas valve. Ensure the area is well-lit so you can clearly see the knob and any labels or instructions that may be present.
Locating the gas knob is integral to the safety and success of the process. It's the first step in shutting off the gas supply to your water heater, which is necessary before relighting the pilot light. Follow these steps to safely locate and use the gas knob:
- Identify the gas control valve at the bottom of the unit.
- Look for a knob labeled with 'Pilot', 'On', and 'Off' positions.
- Verify that the knob is in the correct position before proceeding.
Once you have found the gas control knob, do not proceed until you have read and understood all instructions and warnings associated with your specific water heater model.
Turning Off the Gas Supply
Once you have located the gas knob, it's crucial to turn off the gas to your tankless water heater. Ensure that you wait at least 10 minutes after turning off the gas. This waiting period allows any residual gas within the lines to dissipate, which is a critical safety measure to prevent potential explosions.
Residual gas can pose a significant risk if a pilot light is relit in its presence. Modern water heaters are equipped with safety systems designed to prevent ignition in the event of airflow issues or gas buildup. By adhering to the waiting period, you allow these safety mechanisms to effectively reduce the risk of accidents.
During this time, avoid any actions that could create sparks or flames near the water heater. It's also advisable to ventilate the area to aid in the dissipation of gas.
Remember, patience during this step is not just a recommendation—it's a necessity for your safety and the proper functioning of your water heater.
The Importance of Waiting for Gas Dissipation
After turning off the gas to your tankless water heater, it is crucial to wait before attempting to relight the pilot light. This waiting period allows any residual gas within the unit to safely disperse, which is a critical safety measure to prevent potential accidents. Modern water heaters are equipped with fail-safes that detect airflow issues, preventing ignition in unsafe conditions.
Waiting at least 10 minutes is recommended to ensure that the gas has had sufficient time to dissipate. During this time, the gas pressure should normalize, reducing the risk of igniting a concentrated pocket of gas when you relight the pilot.
If you suspect that airflow problems are affecting your water heater's ability to burn fuel efficiently, it is essential to address these issues before proceeding. Inadequate ventilation can lead to dangerous situations, including the release of carbon monoxide.
Once the waiting period has passed, you can proceed with confidence, knowing that you've taken the necessary precautions for a safe ignition process.
Relighting the Pilot Light
Setting the Control Knob to Pilot
Before attempting to relight the pilot light, it is crucial to set the control knob correctly. Ensure the gas control knob is set to Pilot and fully pushed in — this action should move the knob inward by about 1/4 inch, preparing the system for ignition.
While holding the control knob in the Pilot position, you will be ready to proceed with the lighting process. This step is essential for safety and to prevent the release of excess gas.
If your tankless water heater has an electronic ignition system, you will need to press the ignition button while holding the control knob. For manual systems, a match or lighter will be used to ignite the pilot. The following list outlines the steps for electronic ignition:
- Hold the gas control knob in the Pilot position.
- Press the ignition button repeatedly, about once per second.
- Continue this process for up to 90 seconds until the pilot lights.
Once the pilot is lit, it is important to monitor the flame or status light to ensure it remains stable before proceeding to the next steps.
Methods for Lighting the Pilot
When it comes to lighting the pilot light on your tankless water heater, there are generally two methods: electronic lighting, also known as direct spark, and manual ignition. Electronic lighting is often the more modern approach and can be initiated by holding the gas control knob in the 'Pilot' position while pressing the ignite button. This button is usually square-shaped and clearly marked. You may need to press the ignitor button approximately once per second, and it could take up to 90 seconds for the pilot to light.
For manual ignition, a long lighter or match is typically used. Carefully introduce the flame to the pilot opening while the gas control knob is set to 'Pilot' and pressed in. It's crucial to ensure that the flame is stable and continuous before releasing the knob.
Safety Tip: Always follow the manufacturer's instructions for your specific model. If you're uncomfortable performing this task or if you encounter any issues, do not hesitate to contact a certified plumbing contractor.
Remember, if your water heater has an intermittent pilot system or uses a hot surface igniter, the process may differ. Consult your owner's manual or a professional for guidance specific to your unit.
Electronic Lighting vs. Manual Ignition
When it comes to relighting the pilot light of your tankless water heater, you have two primary methods: electronic lighting and manual ignition. Electronic lighting, also known as direct spark, is a modern approach that typically does not require a constantly burning pilot flame. Instead, it uses an electrical current or a hot surface igniter that activates as needed. To relight using this method:
- Hold the gas control knob and press the ignite button until the flame is stable.
- Press the ignitor button, usually once per second, for up to 90 seconds or until the pilot lights.
On the other hand, traditional manual ignition involves a pilot light that is always lit. This method draws gas through the pilot light to ignite and requires more routine maintenance. If your water heater uses manual ignition and the pilot light goes out, you'll need to relight it manually, which can involve matches or a lighter.
Electronic ignition systems have built-in flame sensors that detect if the burners are lit, providing an extra layer of safety. However, if the system fails, there is no backup, and you may need to contact a professional.
Remember, if you encounter issues with the ignition system or if the pilot light does not stay lit after several attempts, it's advisable to seek professional assistance to prevent potential hazards.
Post-Ignition Checks and Safety Measures
Confirming Successful Ignition
After successfully relighting the pilot light, it's crucial to perform a few post-ignition checks to ensure everything is functioning correctly. Inspect the flame to verify that it's large enough and steady, indicating a proper ignition. Additionally, observe the status light; it should be flashing once per second to signal normal operation.
If the pilot light does not stay lit or the status light indicates an issue, you may need to troubleshoot further. Common problems include a clogged pipe or a kinked hose, which can impede gas flow and prevent the pilot light from staying lit. In cases of electronic ignition system failure, it's advisable to seek professional assistance, as this component is critical for lighting the pilot light.
Ensure that the gas valve is open, the exhaust vent is unobstructed, and the ignition plug is securely attached and free of debris. These steps are essential for maintaining the heater's performance and safety.
Finally, once you've confirmed that the pilot light remains lit and the status light is correct, you can turn the gas control knob back to the 'On' position or adjust it to your preferred temperature setting. Regular monitoring of your tankless water heater's function is key to detecting and resolving issues promptly.
Monitoring for Proper Function
After successfully relighting the pilot light, it's crucial to monitor your tankless water heater to ensure it's functioning correctly. Inspect the flame and check the status light to verify that the flame remains lit, is of adequate size, and maintains a steady burn. The status light should flash once per second, indicating normal operation. If the status light's pattern deviates, further troubleshooting may be necessary.
Inspect the control board and buttons for responsiveness. Press the buttons associated with various functions and observe if they react as expected. An unresponsive control board can signal an underlying issue that requires attention.
Consistent monitoring after ignition is essential to detect any immediate problems and to confirm that the water heater is operating as intended.
If you encounter issues such as a fluctuating flame or unresponsive controls, refer to the manufacturer's troubleshooting guide or contact a professional. Remember, regular maintenance can prevent many common problems associated with electric tankless water heaters, such as blocked filters or faulty thermostats.
What to Do If Problems Persist
If you've followed all the steps to relight your tankless water heater's pilot light and it still isn't functioning properly, it's time to delve deeper into troubleshooting. Check the power supply first; a simple power outage or a tripped circuit breaker could be the culprit. Reset the breaker if necessary, or consider contacting an electrician if the issue is beyond basic troubleshooting.
In some cases, the control board may be unresponsive. If pressing the buttons yields no reaction, ensure that the control board is properly seated against the back of the faceplate. If the issue persists, the control board might need replacement. For detailed steps on checking the wiring and display screen, refer to our Expert Guide to Tankless Water Heater Troubleshooting.
Remember to inspect the flame and the status light after resetting your water heater. The flame should be steady and the status light should flash once per second to indicate proper function.
If these steps do not resolve the issue, it may be time to consult with a professional. Persistent problems could indicate a more serious issue that requires expert attention.
Ensuring your safety after igniting any outdoor equipment is paramount. That's why we've compiled a comprehensive guide on 'Post-Ignition Checks and Safety Measures' to help you enjoy your outdoor adventures without worry. For detailed instructions and safety tips, visit our website and explore our extensive range of outdoor heating solutions and accessories. Don't forget to check out our latest products and take advantage of our free standard shipping and same-day dispatch service. Your safety is our priority, so let us help you prepare for your next outdoor experience with confidence.
Conclusion
Resetting your tankless water heater is a straightforward process that can be safely performed with the right guidance and precautions. By following the step-by-step instructions provided in this guide, you can ensure that your water heater is functioning correctly and efficiently. Remember to always prioritize safety by clearing the area, waiting for gas to dissipate, and adhering to the manufacturer's instructions. If you encounter any difficulties or are unsure about any step, do not hesitate to consult a professional. With your water heater reset, you can now enjoy the continuous flow of hot water in your home.
Frequently Asked Questions
Is it necessary to have specialized tools to relight the pilot light on a tankless water heater?
No, in most cases, no specialized tools are required. It is important to ensure the area around the heater is clear of debris and obstructions.
Is it safe for homeowners to relight the pilot light on their water heater?
Yes, it is generally safe for homeowners to relight the pilot light following the proper safety guidelines and instructions provided in this guide or the owner's manual.
How long should I wait after turning off the gas before attempting to relight the pilot light?
You should wait at least 10 minutes to allow any residual gas to dissipate. This is a crucial safety step to prevent the risk of explosions.
Why do I need to wait before relighting the pilot light after turning off the gas?
Waiting allows built-up gas to safely disperse, which reduces the risk of an accident due to igniting residual gas.
What should I do if the pilot light on my water heater goes out?
If the pilot light goes out, you should follow the step-by-step instructions provided in this guide or your water heater's owner's manual to safely relight it.
Are there different methods for lighting the pilot light depending on the type of water heater?
Yes, there are typically two methods for lighting the pilot light: electronic lighting/direct spark and manual ignition. The method you use will depend on the type of water heater you have installed.